
This project is dedicated to creating a model of a female character in 3dmax. When creating have been prescribed such features: as a realistic, mid - poly, and clear mesh, in other words, universal model with a small number of polygons and realistic proportions, which can be used for modern games, fantasy arts in different armor, and etc.
I have not studied thoroughly 3d max, did not attend any training courses, and all my knowledge is based personal experience, so if will seem that something is wrong, do not judge strictly.
modifiers:
edit mesh (collapse, extrude)
meshsmooth
Symmetry
Unwrap UVW
1. So first there was an emptiness, clean window in 3d max. After appeared the object cylinder. Further with the modifier "edit mesh" and option "ехtrude" over the last few days from the cylinder was made figure of a woman in low-poly, body without a head, hands and feet.
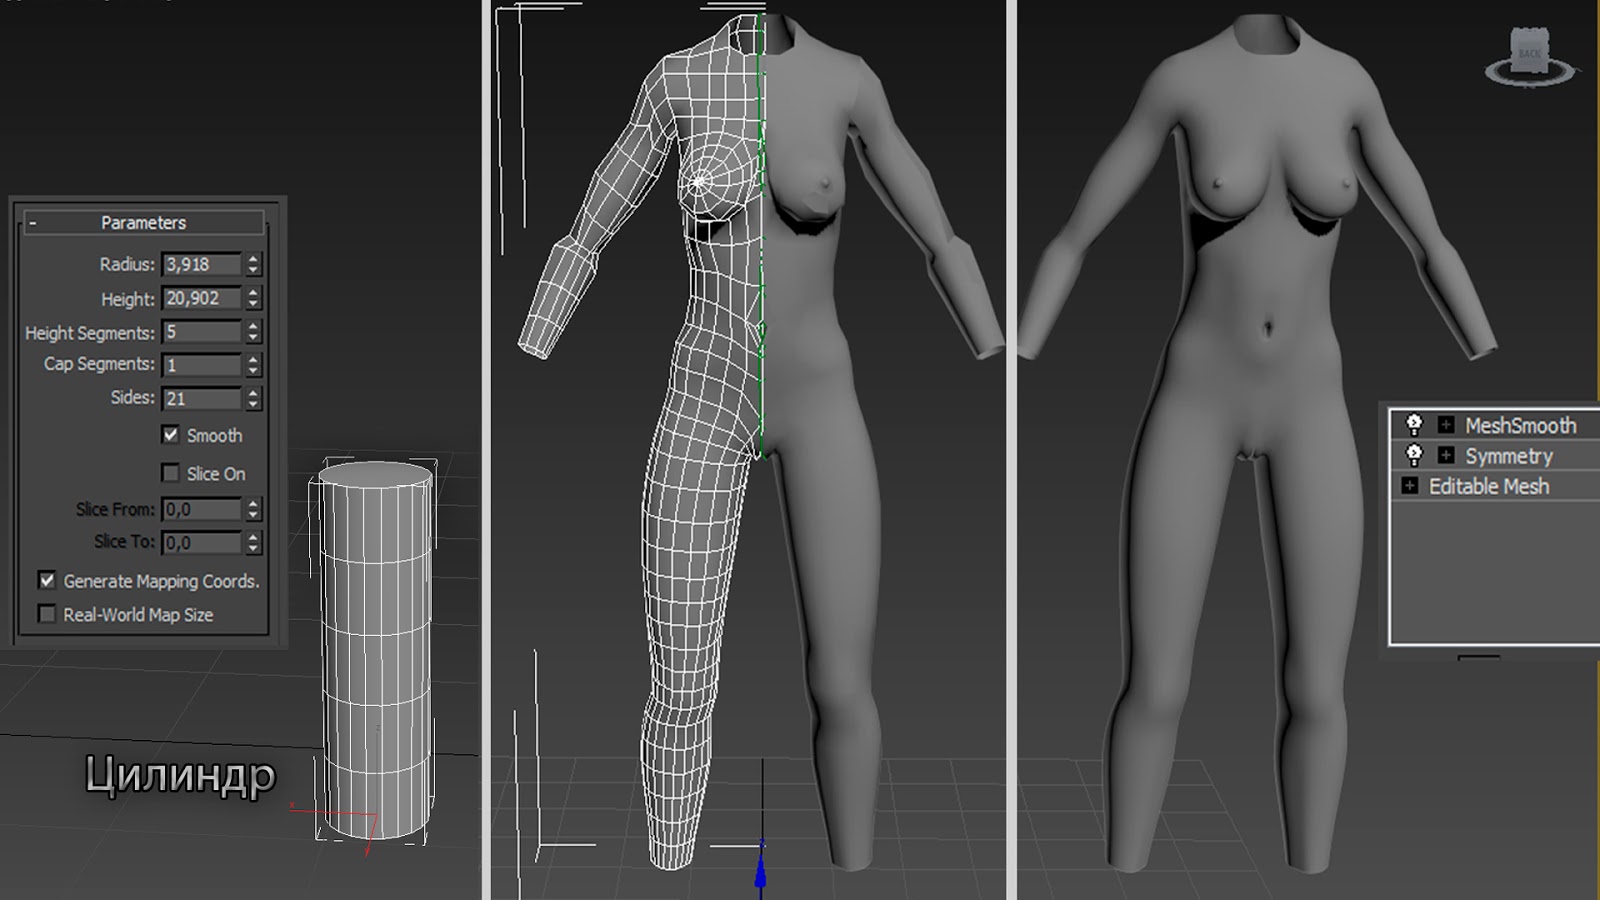
2. After some time had to do something similar to the head, arms, legs. were slightly corrected proportions. In general, is what I call the starting base. The model for processing.

3. It all began on a smooth straight line, but further work is extremely complicated:
A lot of time was spent on the adjustment of proportions. detailed elaboration of small areas, lips, ears, etc. Every now and then I returned several times by improving one part of the body to improve the other, several times reworked shoulders and back. Photos on the Internet a lot and all the different, sometimes to find something the average - is a problem.

Further the control correction in "editmesh" than "meshsmooth". Work with low-poly finished.
Work with "mid-poly". If in "low-poly" I created a model, in "mid-poly" I improve it. - correction mesh in some areas and cleaning of unnecessary polygons in "editmesh", formed following a previously imposed "meshsmooth".

4.
For the model of the female body with a budget of 42 K polygons (not including eyelashes, hair, eyes, teeth and tongue), is the maximum possible and necessary for realism detalisation of average statistical woman's body.
Below are some screenshots of the model and the mesh.


option: elven ears


option for high heels

The result is something like this


5. UV map:
The final touch is to create a UV map.
UV map.

seams.

Я накинул текстуру шахматной доски, чтобы вы могли подробно рассмотреть качество UV


Outcome:
Textures are not yet completed. can be tell temporary. For a more realistic of them still need to work. But what will happen next, new textures, maybe some improvement, clothing, armor, jewelry - everything will come with time. The main thing I have done what I wanted !:
With a clear and smooth mesh in the final model weighs only 42 thousand polygons that is universally suitable for almost any 3D industry, clean and evenly dispersed to the number of million polygons - there's someone how much you need.
Комментариев нет:
Отправить комментарий